Setup/Installation: Pinterest – Social Networks Auto-Poster for WordPress
Pinterest don’t have a built-in API for automated posts yet. You need to get a special API library module to be able to publish to Pinterest. API library modile is included in the SNAP Pro WordPress plugin.
Pinterest Configuration
1. Connect Pinterest to your WordPress.
1. Login to your WordPress Admin Panel, Go to the Settings->Social Networks AutoPoster Options.
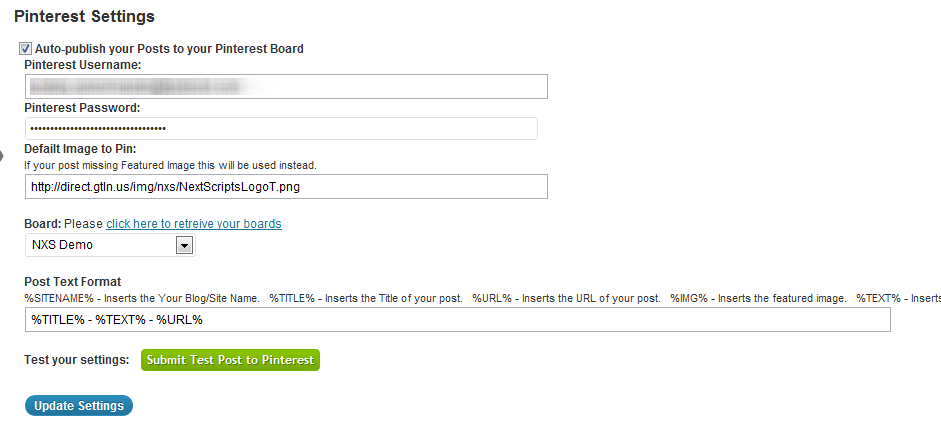
2. Click green “Add new account” button, select “Pinterest” from the list.
3. Fill Pinterest Login and Password.
4. Enter the URL for default image. It will be used in case your post don’t have a featured image.
5. Click link “Click here to retreive your boards”
6. Select default board to be pinned to. You will be able to select a different board during the post writing.
7. Click “Update Settings”.
2. Your Pinterest is ready to use.
Plugin will “pin” your “Featured image”. If “Featured image” is not set, it will take the first image in your post. If your post has no images it will take default image.
How to setup each type of Social Network
~ Facebook Configuration~ Twitter Configuration
~ Google+ Configuration
~ Pinterest Configuration
~ App.Net Configuration
~ Blogger Configuration
~ Delicious Configuration
~ Deviantart.com Configuration
~ Diigo Configuration
~ Flickr Configuration
~ [New]MailChimp Configuration
~ [New]Medium Configuration
~ [New]Instagram Configuration
~ Instapaper Configuration
~ LinkedIn Configuration
~ LiveJournal/Dreamwidth Configuration
~ [New]Ok.ru Configuration
~ Reddit Configuration
~ [New]Telegram Configuration
~ Scoop.It Configuration
~ Stumbleupon Configuration
~ Tumblr Configuration
~ Plurk Configuration
~ vBulletin Configuration
~ vKontakte(vk.com) Configuration
~ Blog.com/Wordpress.com Configuration
~ YouTube Configuration
~ [New]Weibo Configuration
~ [New]Yo Configuration
~ [New]500px Configuration
Have problems? Please check out the Troubleshooting FAQ page.