Twitter: Setup/Installation Social Networks Auto-Poster for WordPress
Twitter uses OAuth to provide authorized access to its API. You need to create Twitter application with “Read and Write” access level and get “API key”, “API secret”, “Access token”, and “Access token secret”.
There is no need to separately “authorize” your blog, just enter all applicable info.
Twitter Configuration
1. Create a Twitter App for your website.
1. Login to your Twitter account.
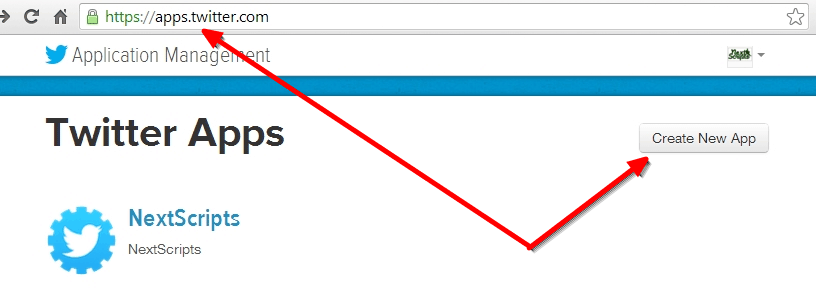
2. Go to the Developers website: https://apps.twitter.com/ Sign in again if asked. Click “Create a new app” button on the right.
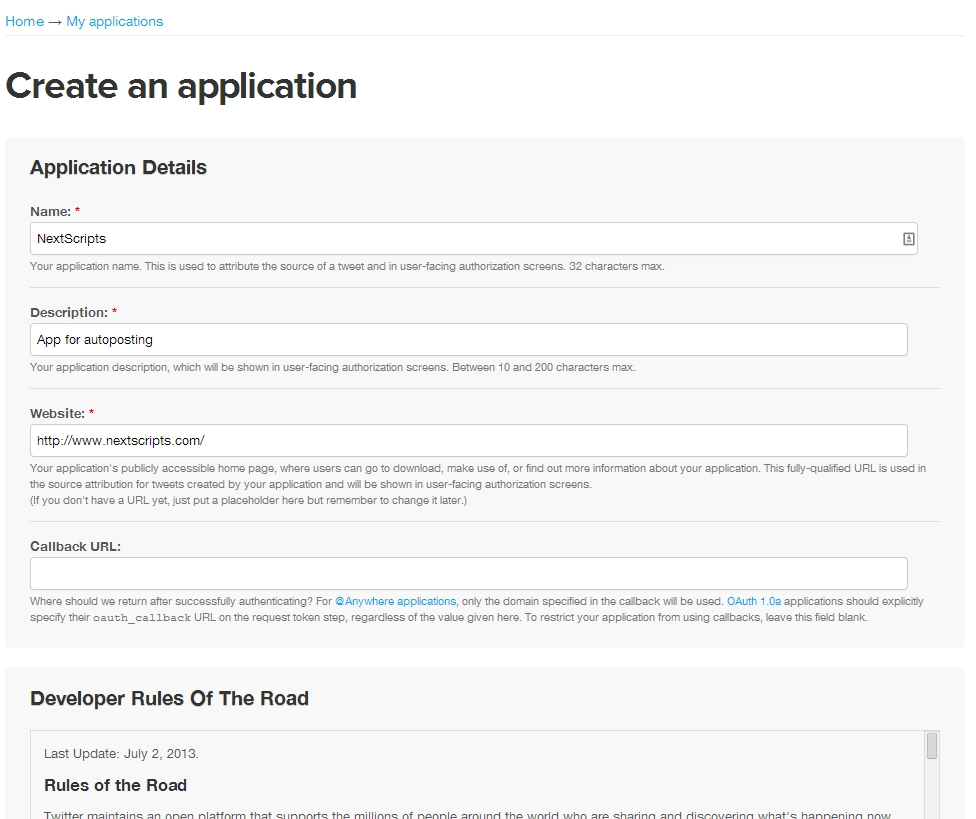
3. Fill details, click “Create your Twitter application”.
Please use your own information for the next step, don’t literally re-type “NextScripts Blog”, “NextScripts.com” and other sample info.
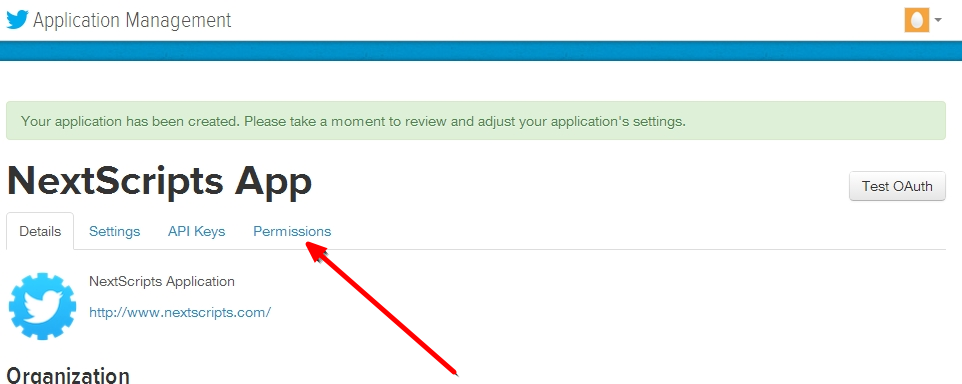
4. Click “Permissions” tab.
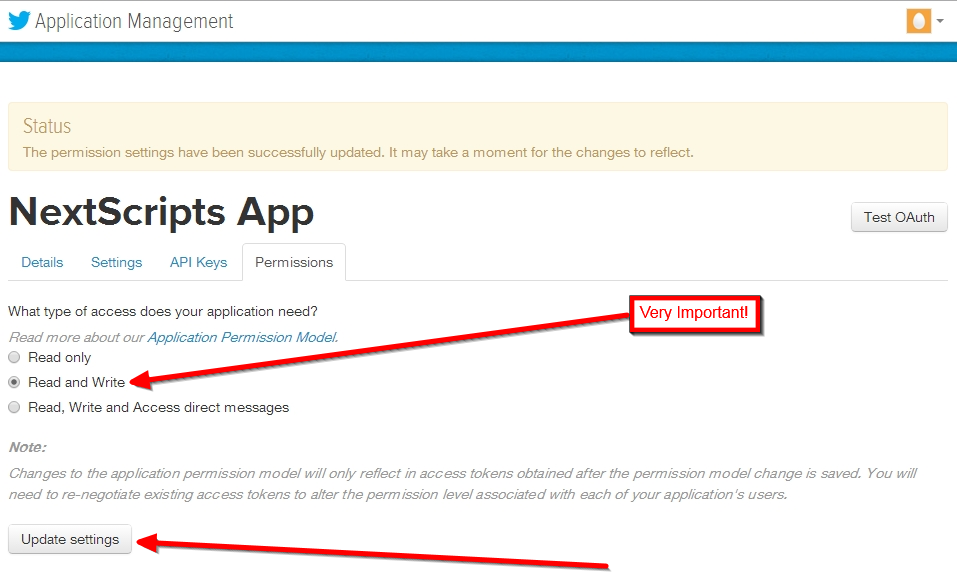
[Very Important] Change “Permissions” to “Read and Write”. Click “Update Settings”
Twitter requires you to add mobile phone number to your account and confirm is via SMS. If your phone provider is not yet supported there is a workaround:
If you install the official mobile application on iOS/Android phone, then you can login to the website with mobile number and change permissions from “read” to “read/write”.
1. Install and sign in to the official Twitter app on your iPhone or Android phone.
2. Assign your phone number to your twitter account inside that app.
3. Come back to twitter.com from your PC, logout and login with your phone number instead of your username.
4. Go to the dev and change permissions. You won’t be asked for SMS confirmation.
5. Click “Keys and Access Tokens” tab. Click “Create my access token” button at the end of the page.
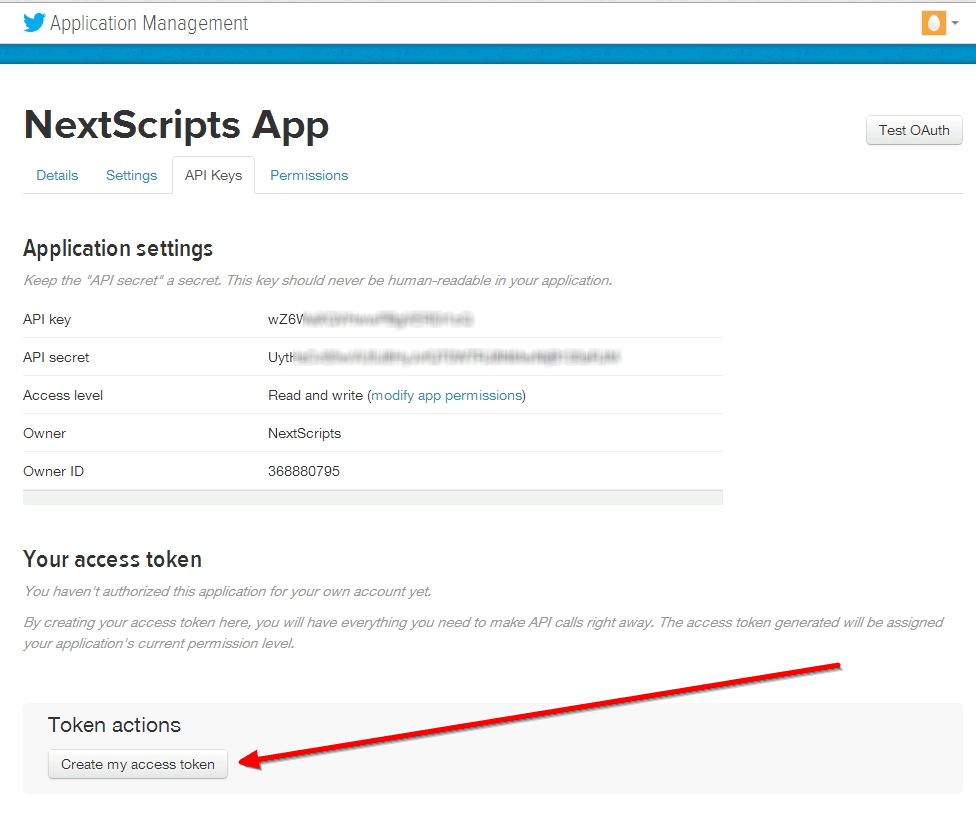
Wait couple minutes and click “Refresh”. (Keep refreshing the page until you see “Your access token section.”)

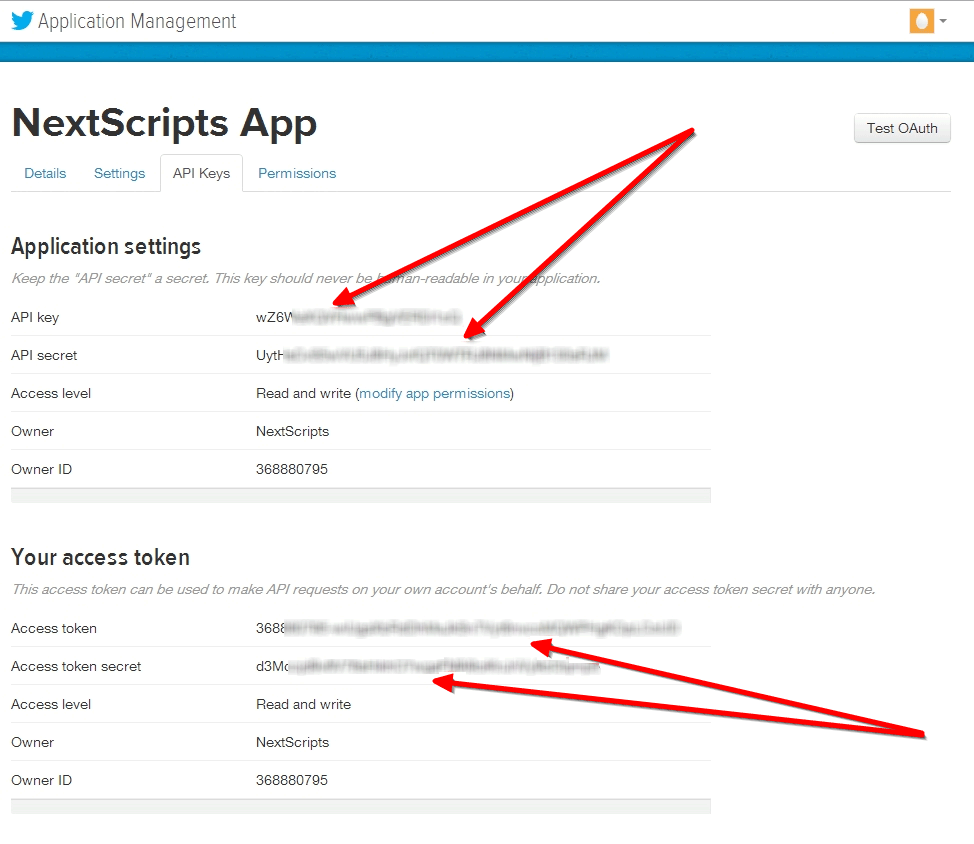
– Notice API key and API secret as well as “Access token” and “Access token secret” on this page.
FAQ: Question: I am getting this error when testing my account.{“error”:”Read-only application cannot POST”,”request”:”/1/statuses/update.json”}
Answer: Please check steps 4 and 5 again. Make sure your have “Read and Write” for both “OAuth settings” and “Your access token”
2. Connect Twitter to your WordPress.
1. Login to your WordPress Admin Panel, Go to the Settings->Social Networks AutoPoster Options.
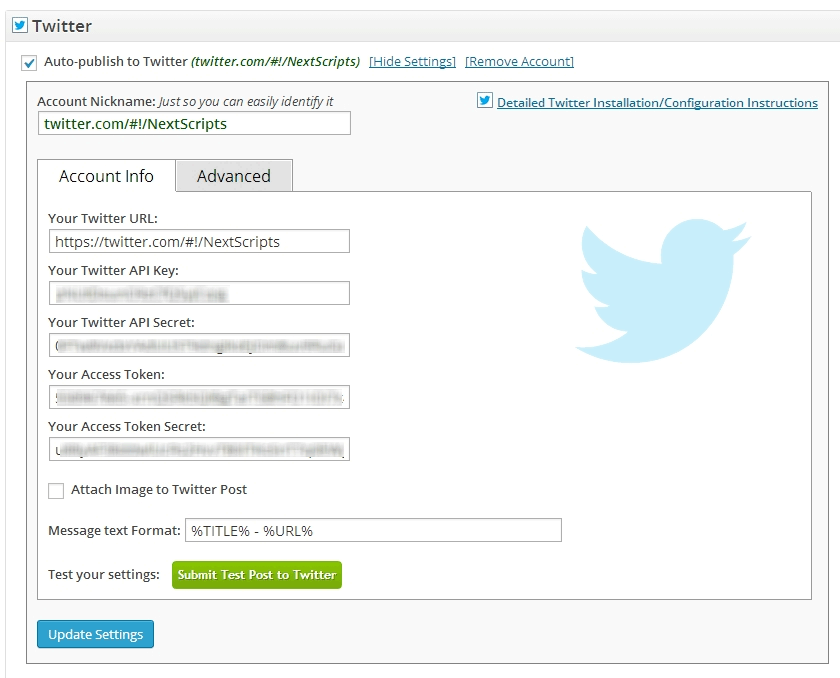
2. Check “Auto-publish your Posts to your Twitter Page or Profile” checkbox.
3. Fill your Twitter URL.
4. Fill “API key” and “API secret” from step 5 above.
5. Fill “Access token” and “Access token secret” from step 5 above.
3. Your Twitter is ready to use.
How to setup each type of Social Network
~ Facebook Configuration~ Twitter Configuration
~ Google+ Configuration
~ Pinterest Configuration
~ App.Net Configuration
~ Blogger Configuration
~ Delicious Configuration
~ Deviantart.com Configuration
~ Diigo Configuration
~ Flickr Configuration
~ [New]MailChimp Configuration
~ [New]Medium Configuration
~ [New]Instagram Configuration
~ Instapaper Configuration
~ LinkedIn Configuration
~ LiveJournal/Dreamwidth Configuration
~ [New]Ok.ru Configuration
~ Reddit Configuration
~ [New]Telegram Configuration
~ Scoop.It Configuration
~ Stumbleupon Configuration
~ Tumblr Configuration
~ Plurk Configuration
~ vBulletin Configuration
~ vKontakte(vk.com) Configuration
~ Blog.com/Wordpress.com Configuration
~ YouTube Configuration
~ [New]Weibo Configuration
~ [New]Yo Configuration
~ [New]500px Configuration
Have problems? Please check out the Troubleshooting FAQ page.