Setup/Installation: Facebook – Social Networks Auto-Poster
The Facebook Platform uses OAuth 2.0 for authentication and authorization. You need to setup Facebook Application and connect this application to your blog and authorize it.
Plugin could post:
1. Facebook Profile.
2. Facebook Pages (all kinds) (User who authorized the plugin must be an admin of the page).
3. Public Groups (User who authorized the plugin must be at least a member of the public group).
4. Closed groups (User who authorized the plugin must be an admin* of the closed group).
5. Secret groups (User who authorized the plugin must be an admin* of the secret group).
* There’s an unofficial workaround for posting to Closed/Secret Groups if you just a member (not an admin).
Please see the instructions below:
Facebook Configuration
1. Create an app and community page for your website.
1. Login to your Facebook account.
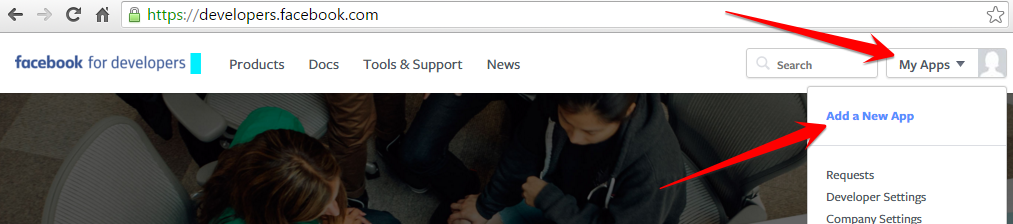
2. Go to the Developers page: https://developers.facebook.com/
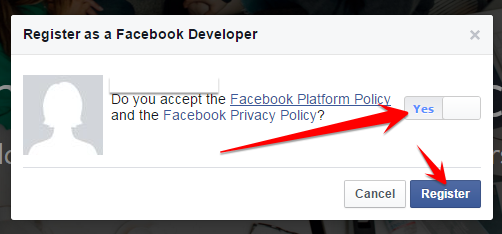
If you are not registered as “Developer” yet, you need to click blue button “Register”. Click here to see the Register as a Developer instructions, otherwise proceed to the step #3.


FAQ: Question: Why I can’t create an app on developers.facebook.com/apps ? When I am trying to enter that page it redirects me back to my account?
Answer: Facebook “Business” or “Advertising” accounts can’t manage apps. Only real user accounts are able to create and manage apps. Please login to Facebook as a personal account to be able to create app.
3. Click “My Apps -> Add a New App” menu item.
Fill “App Name”, Contact email, leave “App Namespace” empty, select any category. agree to policies and click “Create App ID”, solve captcha (if asked), click “Submit”.
Important: Please use your own information, don’t literally re-type “NextScripts Blog”, “NextScripts.com” and other sample info.

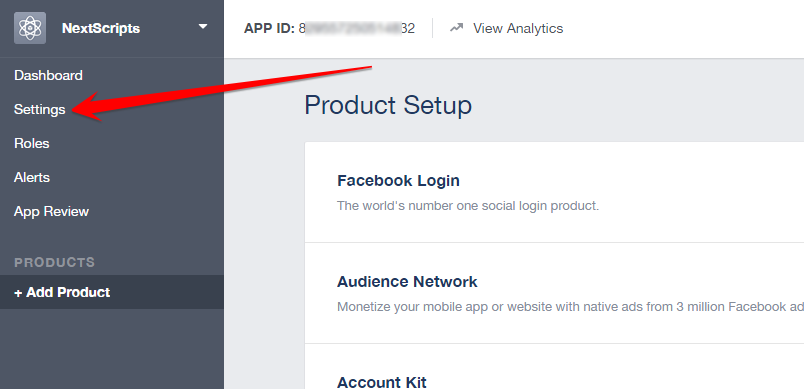
4. No need to add any products, just click “Settings” on the left.
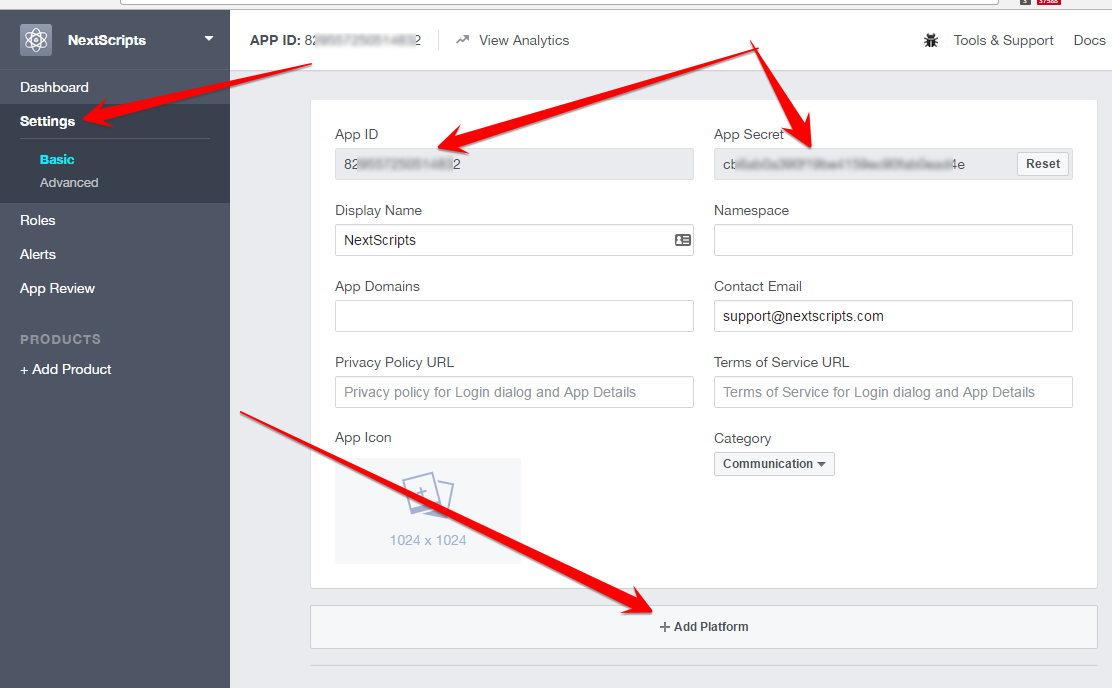
– Notice App ID and App Secret (Click “Show”, enter your password (if asked)) on this page.
– Fill “Contact email” field (if empty), then click “Add Platform”.
5. Select “Website” in the list.
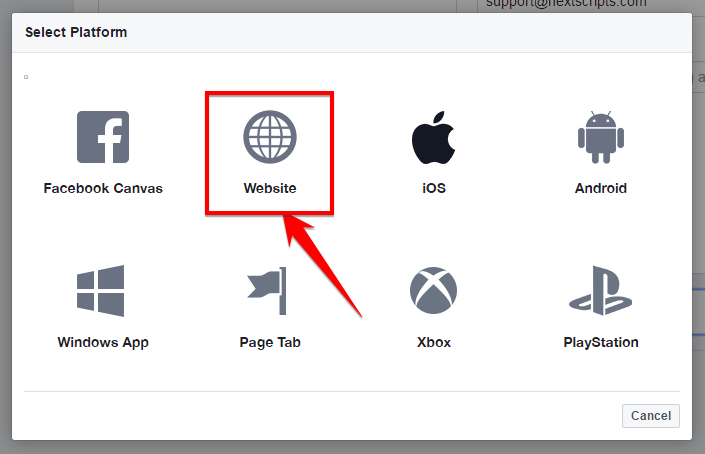
Enter your full website URL to the “Site URL” field. Enter your domain to the App Domains. Domain should be the same domain as the URL that you have entered to the “Site URL”.
Important!: You must enter the URL and domain that you see in your WordPress Admin Panel. For example your visitors come to your blog at http://blog.nextscripts.com, but you manage your blog from http://www.nextscripts.com/blog/wp-admin/ – you must enter http://www.nextscripts.com/blog to the URL Field and www.nextscripts.com as the domain. Also please note that nextscripts.com and www.nextscripts.com are two different domains.
Important!!! Again, Please use your own information, don’t literally re-type “NextScripts Blog”, “NextScripts.com” and other sample info.

“Important” Please also enter your contact email. You won’t be able to make public posts without entering email.
Click “Save Changes”
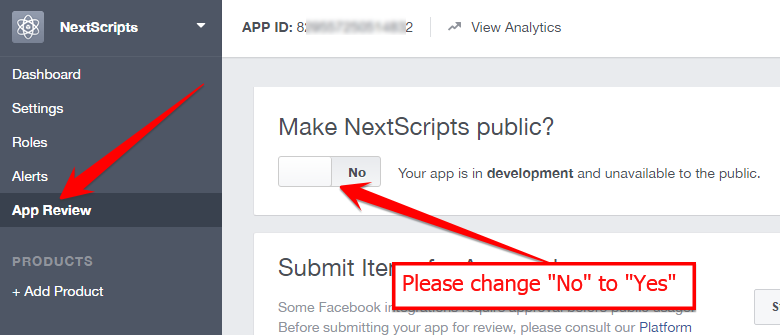
6. All Facebook apps are “Sandboxed” by default. All posts will be visible only to to Admins, Developers and Testers. You need to take an app “Live” if/when you would like your posts to be seen by everybody.
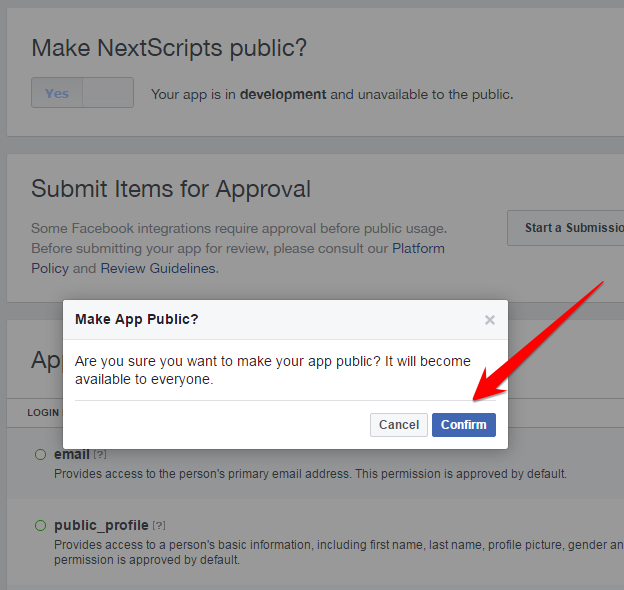
Click “App Review” on the left. Change “Make APPNAME public?” switch from “No” to “Yes”.
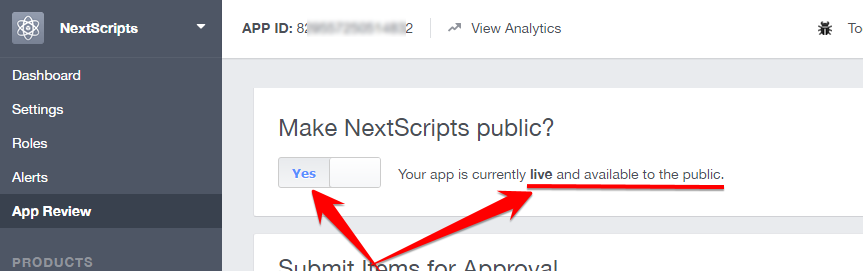
Your App is ready to use.
Just to avoid any confusion. You don’t need to submit your app for review and approval. Review and approval are required ONLY for apps that will be used publicly by other people. SNAP will be authorized and make posts ONLY as you (as the admin of the app). No review and approval are necessary for admin usage.
2. Connect Facebook to your WordPress.
1. Login to your WordPress Admin Panel, Go to the Settings->Social Networks AutoPoster Options.
2. Click green “Add new account” button, select “Facebook” from the list.

3. Fill “App ID” and “App Secret” from step 3 above.
4. Click “Authorize Your Facebook Account” and follow the authorization wizard. Facebook will ask you series of questions. If you get any errors at this step, please make sure that domain for your WordPress site is entered to your App as “App Domain”.
Important: If Facebook tell you that you need to switch to your main account, you will need to close the wizard, go to facebook.com, switch account, and then start authorization from the beginning.
[Update – May 2014] Facebook changed some rules regarding the apps. This means that the Facebook App, Facebook profile or page and the user who authorizes the app MUST belong to the same Facebook account. So please make sure you are logged to Facebook as the same user who created the app.
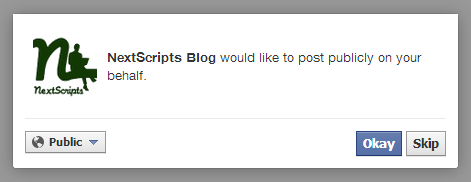
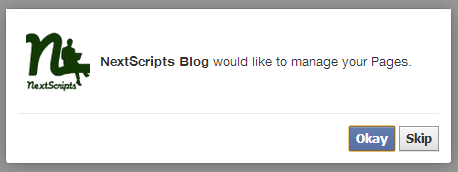
Important: When Facebook Authorization Wizard asks you for the access privileges to your profile/pages, do not uncheck anything and don’t click “Skip”.
Facebook don’t have the ability to request permission to just one page. It’s either all of them or none. If you click “Skip” it means you forbid Facebook from posting to any of your pages, groups or profiles.
Our plugin will post only to the page that you specify.
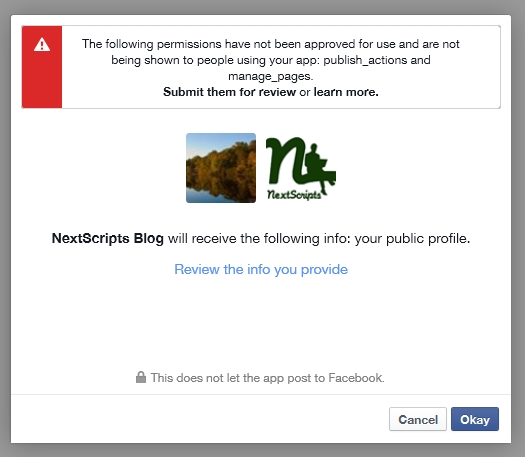
Note (Again): Please don’t pay attention to the red message on top of the screenshot above, you don’t need to submit your app for review if you will be posting to the profile and pages you admin.

4. Your Facebook account is ready to post to your Profile.
5. [Optional] Find your new account in the list and click [Show Settings]. Notice new “Where to Post” dropdown showing your pages and groups. Select Profile or one of the pages or groups and click “Update Account Info”.
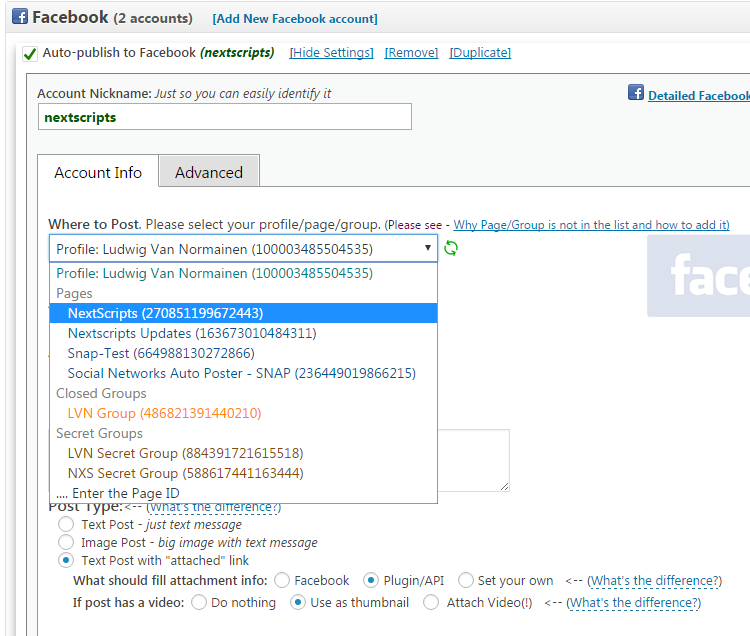
If your page or groups is NOT in the list please see how to add it here: Why Page/Group is not in the list and how to add it
How to setup each type of Social Network
~ Facebook Configuration~ Twitter Configuration
~ Google+ Configuration
~ Pinterest Configuration
~ App.Net Configuration
~ Blogger Configuration
~ Delicious Configuration
~ Deviantart.com Configuration
~ Diigo Configuration
~ Flickr Configuration
~ [New]MailChimp Configuration
~ [New]Medium Configuration
~ [New]Instagram Configuration
~ Instapaper Configuration
~ LinkedIn Configuration
~ LiveJournal/Dreamwidth Configuration
~ [New]Ok.ru Configuration
~ Reddit Configuration
~ [New]Telegram Configuration
~ Scoop.It Configuration
~ Stumbleupon Configuration
~ Tumblr Configuration
~ Plurk Configuration
~ vBulletin Configuration
~ vKontakte(vk.com) Configuration
~ Blog.com/Wordpress.com Configuration
~ YouTube Configuration
~ [New]Weibo Configuration
~ [New]Yo Configuration
~ [New]500px Configuration
Have problems? Please check out the Troubleshooting FAQ page.