Setup/Installation: LinkedIn – Social Networks Auto-Poster for WordPress
LinkedIn Native API (v1 and v2): Free built-in API from Linked In. Can be used for posting to your profile and company page (v2 only). More secure, more stable. More complicated – requires LinkedIn App and authorization.
NextScripts API for LinkedIn: Premium API with extended functionality. Can be used for posting to your profile, Pulse, group page or company page. Less secure – requires your password.
LinkedIn Native API
LinkedIn native API uses the OAuth protocol to give your application authorized access to the APIs. You need to register your application on theirs developer portal and receive an API key and API secret. This key helps us identify your application and lets you make an API call. Once you’ve registered your app, a developer token and secret is provided to you along with your API key.
LinkedIn Configuration
1. Create an app for your website (This part is the same for both API v1 and API v2)
1. Login to your Linked In account.
2. Go to the Developers page: https://developer.linkedin.com/
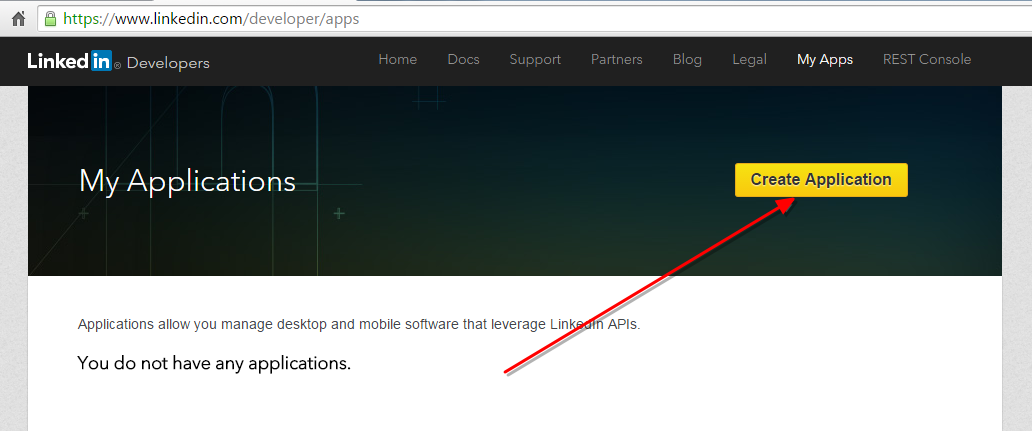
3. Click on “My Apps” in the top right corner or just go to the https://www.linkedin.com/developer/apps

3. Click “Create Application” button.
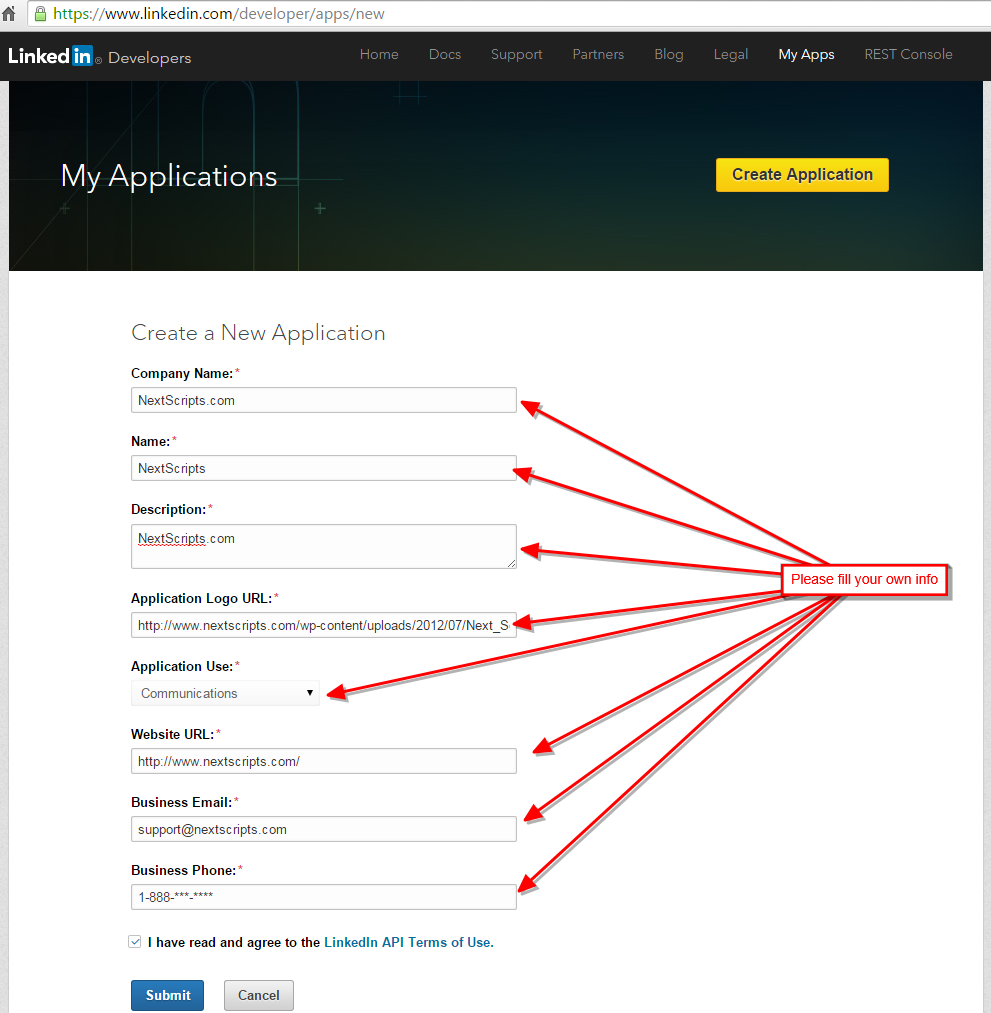
Fill “Company Name”, “Application Name”, all other required info and agree to terms of use. Please use your own information, don’t literally re-type “NextScripts.com” and other sample info.
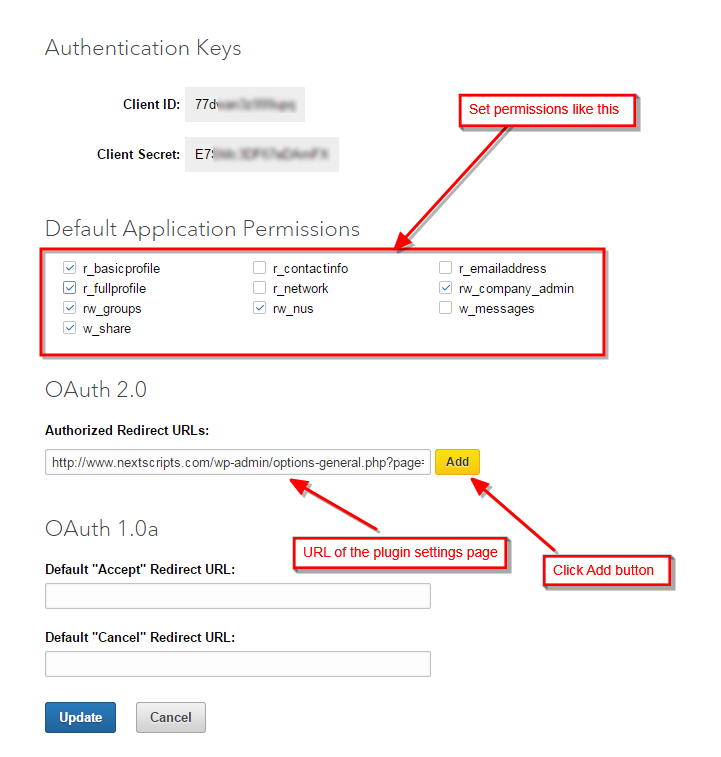
– Notice Client ID and Client Secret on this page.
Please enter “OAuth 2.0 Redirect URL” field. It should contain the exact URL of your plugin settings page.
!VERY IMPORTANT STEP!
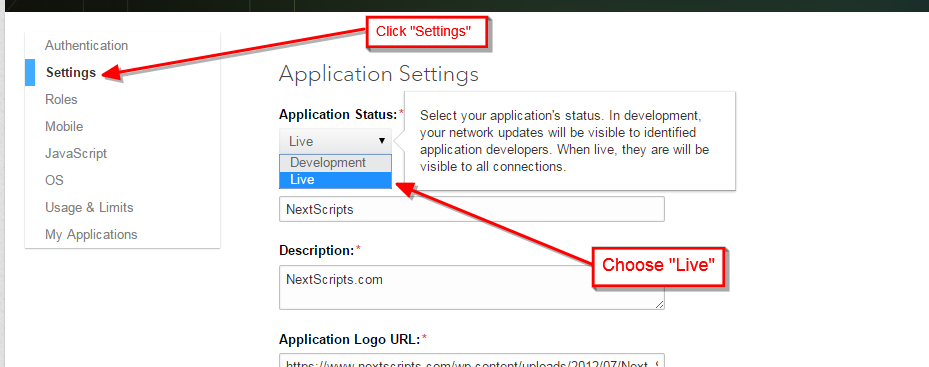
Click “Settings”, select “Live” in the “Application Status” field.
LinkedIn API v1 (Profile Only)
2. Connect LinkedIn API v1 to your WordPress.
1. Login to your WordPress Admin Panel, Go to the Settings->Social Networks AutoPoster Options.
2. Click “Add new account”, select LinkedIn.
3. Fill “Client ID” and “Client Secret” from step 3 above.
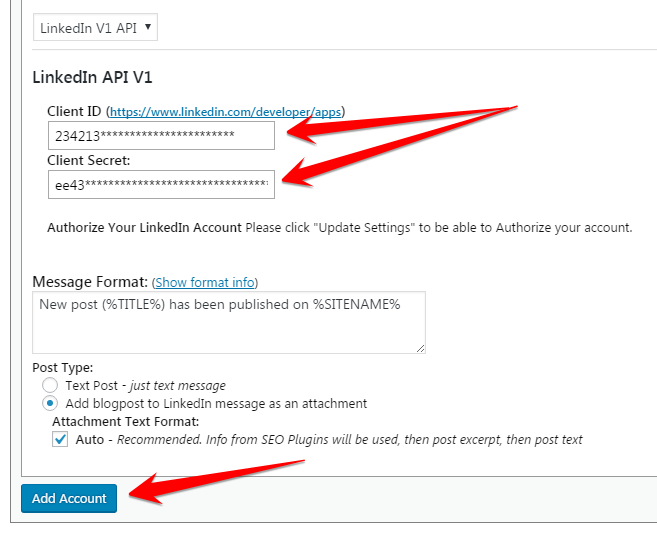
4. Click “Add Account”
3. Authorize LinkedIn for your WordPress.
1. Find your new account in the list and click [Show Settings]. Notice link “Authorize Your Linked In Account”.
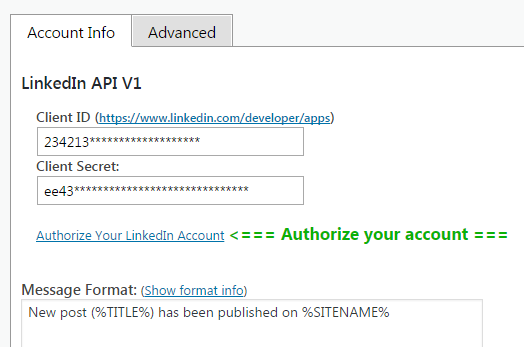
2. Click “Authorize Your LinkedIn Account” and follow the authorization wizard.
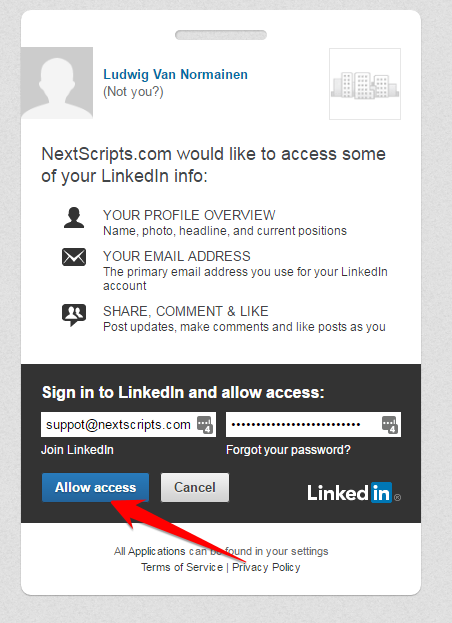
4. Your LinkedIn account is ready to use.
LinkedIn API v2 (Profile and Company Pages)
2. Connect LinkedIn API v2 to your WordPress.
1. Login to your WordPress Admin Panel, Go to the Settings->Social Networks AutoPoster Options.
2. Click “Add new account”, select LinkedIn.
3. Fill “Client ID” and “Client Secret” from step 3 above.

4. Click “Authorize Your Linked In Account” and follow the authorization wizard.

5. Your LinkedIn account is ready to post to your profile.
6. [Optional] Find your new account in the list and click [Show Settings]. Notice new dropdown showing your pages. Select Profile or one of the pages.

NextScripts API for LinkedIn
Auto-posting to LinkedIn Profile, Pulse, Company Pages and Groups
Note:
LinkedIn currently does not allow posting to pulse or groups from the native API.
You need to get “SNAP API for LinkedIn” to be able to post to company pages. “SNAP API” is included in the SNAP Pro plugin for WordPress.
Setting up NextScripts API for LinkedIn.
This is “Pro” only functionality for posting to Profile, Pulse, Company Pages and Groups
1. Login to your WordPress Admin Panel, Go to the Settings->Social Networks AutoPoster Options.
2. Click “Add new account”, select LinkedIn.
3. Choose NextScripts API, “Email” and “Password”. Once you are done, plugin will check your credentials and fill dropdowns with your pages and groups.
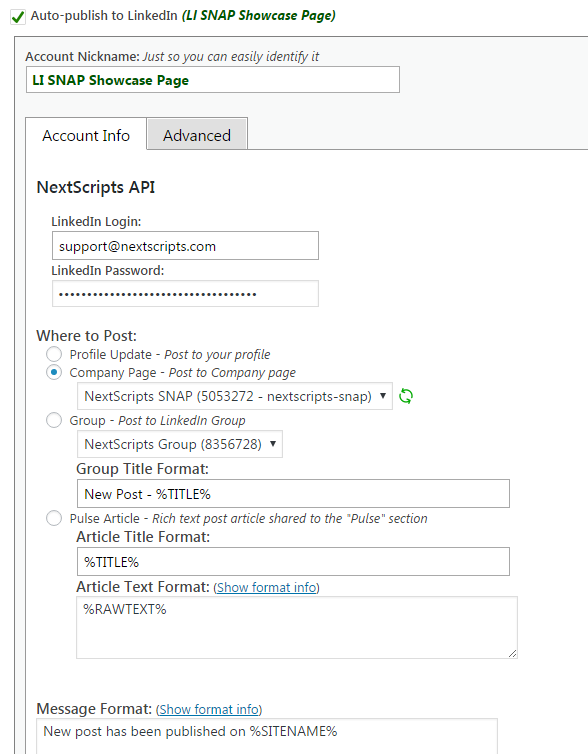
5. Select where you would like to post and click “Add Account”
6. Your LinkedIn account is ready to use.
FAQ. In case you get “Please enter your code” or “Login Problem – You have exceeded the maximum number of code requests. Please try again later” situation.
1. Add LinkedIn account. Ignore any errors you might get.
2. Wait for some time.
3. Go to that LinkedIn account settings and click “Test” button.
4. Plugin will ask you for a code. “Do not close that window!“. Check your email or phone, get the code, enter it.
5. it will work fine after that.


